Quick answer: Freehand sharpening a Bowie knife means using a whetstone or sharpening stone without a guide to restore and refine the blade’s edge. Hold the blade at a consistent 15–20° angle, work through progressively finer grits, and finish with a leather strop. Done correctly, it produces a sharper, longer-lasting edge than most mechanical sharpeners.
A Bowie knife is a serious tool. Whether you carry one for hunting, bushcraft, or collection, the edge is what makes it useful and freehand sharpening is the method that gives you the most control over that edge. Guided systems have their place, but freehand sharpening lets you adapt your technique to the blade’s geometry, correct uneven wear, and develop a feel for the steel that no jig can replicate.
This guide walks you through everything: the tools you need, the exact steps to follow, the mistakes that most beginners make, and the habits that separate a serviceable edge from a razor-sharp one.
What Is Freehand Sharpening for a Bowie Knife?
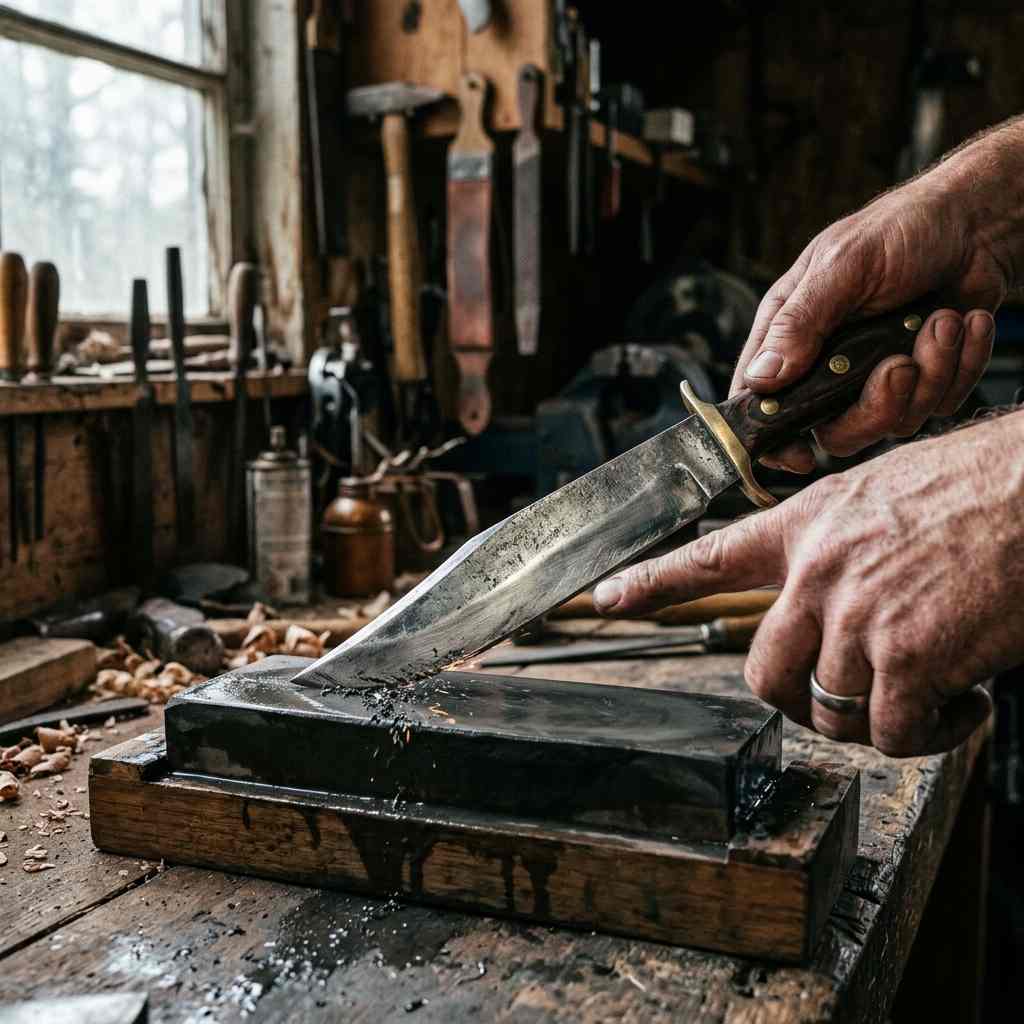
Freehand sharpening means sharpening a blade by hand no angle guides, no electric wheels, no pull-through gadgets. You hold the knife at a specific angle against a whetstone and work the blade across the stone in controlled strokes.
For a Bowie knife specifically, freehand sharpening is the preferred method among experienced knife users because Bowie knives typically feature a long clip-point blade with a distinct belly curve. That curve requires you to adjust your wrist position as you stroke something a fixed guide simply cannot do. Freehand technique gives you that flexibility.
The trade-off is that freehand sharpening takes practice. Angle consistency is everything. Hold the blade even a few degrees too steep or too shallow and you’ll roll the edge rather than refine it.
What Tools and Materials Do You Need to Sharpen a Bowie Knife Freehand?
You do not need an extensive kit to sharpen a Bowie knife freehand. We recommend starting with these core items:
- Coarse whetstone (120–400 grit): Use this to repair a damaged or very dull edge. Skip it if the knife only needs a touch-up.
- Medium whetstone (800–1000 grit): The primary sharpening stage. This removes metal efficiently and begins forming the edge bevel.
- Fine whetstone (2000–3000 grit): Refines the edge and smooths out scratches left by coarser grits.
- Polishing stone (6000–8000 grit): Optional, but worth using if you want a refined, hair-shaving edge.
- Leather strop with stropping compound: The finishing step. Stropping realigns the burr and polishes the apex of the edge.
- Honing oil or water: Lubricates the stone surface, floats away swarf, and prevents glazing. Check your stone’s specifications some require oil, others water.
- A stable surface: A rubber base or damp cloth under the stone keeps it from sliding mid-stroke.
A quality Bowie knife like the CS2 is built from high-carbon or stainless steel that responds well to progressive sharpening. Knowing your blade’s steel type matters harder steels require more passes on coarser grits but hold an edge longer once sharpened.
Step-by-Step Guide to Freehand Sharpening a Bowie Knife
Step 1: Identify the Correct Sharpening Angle
Most Bowie knives sharpen best at 15–20 degrees per side. A 20-degree angle produces a durable edge suited for heavy use. A 15-degree angle gives you a finer, keener edge better suited to slicing tasks.
To find your angle without a protractor: lay the blade flat on the stone (0°), then raise the spine until it’s roughly two finger-widths off the surface. That gives you approximately 15–17 degrees.
Step 2: Start with the Appropriate Grit
Assess the edge first. Run your thumb lightly across (not along) the blade edge to feel for chips, flatness, or rolling. If the edge is in rough shape, start on your coarse stone. If it’s just dull from regular use, begin on the medium grit.
Step 3: Work the Edge in Controlled Strokes
Place the blade on the stone with the edge facing away from you, tip pointing toward the far end of the stone. Apply light downward pressure and push the blade forward as if slicing a thin layer off the stone’s surface.
As you reach the curved belly of the Bowie blade, gradually lift your wrist to maintain the correct angle throughout the curve. Keep your strokes smooth and consistent. Avoid grinding the same section repeatedly work the full length of the blade in each stroke.
We recommend 8–10 strokes per side before switching, then progressively reducing to 6, 4, and 2 strokes per side as you move through finer grits.
Step 4: Check for a Burr
After several strokes on one side, run your fingertip lightly across the opposite side of the edge (the side you were not sharpening). You should feel a slight roughness or curl this is the burr. A consistent burr across the full edge length tells you that side is done. Switch sides and repeat.
Step 5: Move Through Progressive Grits
Once a burr forms consistently on both sides at your starting grit, move to the next finer stone. Repeat the process: even strokes, alternate sides, check for burr transfer. Each grit removes the scratches left by the previous one.
Do not skip grits. Jumping from 400 grit to 3000 grit skips the refinement stages and leaves a rough, unstable edge.
Step 6: Strop the Blade
Lay your leather strop flat. Hold the blade spine-first (edge trailing away from you) and draw it backward across the leather. Alternate sides with each stroke 10 passes per side to start.
Stropping realigns the microscopic teeth at the edge apex and removes the final burr. This step makes a measurable difference in sharpness.
What Are the Best Tips for Getting a Sharp Edge on a Bowie Knife?
- Maintain consistent angle throughout the entire stroke. Any angle drift produces a rounded, weak edge rather than a crisp bevel.
- Use light pressure on finer grits. Heavy pressure on a fine stone removes metal unevenly and creates a scratchy finish.
- Count your strokes. Alternating equal numbers of strokes per side keeps the bevel symmetrical.
- Sharpen dry if possible. Some experienced sharpeners work without lubricant on certain natural stones to get better feedback from the steel. Experiment once you’re comfortable.
- Test sharpness on paper or arm hair. A sharp blade slices printer paper cleanly without tearing. An exceptionally sharp edge will shave arm hair without dragging.
What Are the Most Common Freehand Sharpening Mistakes to Avoid?
Inconsistent angle: This is the most common error. A wobbly angle produces a rounded, convex bevel that looks dull under magnification even if the knife technically cuts.
Too much pressure: Pressing hard does not sharpen faster. It flexes the blade, gouges the stone, and produces an uneven edge. Let the abrasive do the work.
Skipping the strop: Many beginners stop at the polishing stone and skip stropping. The strop removes the wire burr that hangs off the edge after sharpening without it, the edge feels sharp for a few cuts, then folds over.
Sharpening only one side: Some beginners sharpen one side until the knife cuts, without developing the bevel equally on both sides. This produces an asymmetric edge that dulls quickly.
Not cleaning the stone: Swarf metal particles and stone residue builds up on the surface and reduces cutting efficiency. Rinse or wipe the stone periodically during your session.
What to Do After Sharpening Your Bowie Knife
Once you’re satisfied with the edge, wipe the blade clean with a dry cloth to remove any metal residue or stone particles. Apply a thin coat of mineral oil or knife-specific blade oil to protect the steel, especially if it’s high-carbon. Store the knife in a dry sheath or on a magnetic rack avoid sheaths that trap moisture against the blade.
We also recommend testing the edge on a practical task within a day or two of sharpening. This confirms the edge performs as expected and helps you calibrate your technique for next time.
Frequently Asked Questions About Bowie Knife Freehand Sharpening
What angle should I use to sharpen a Bowie knife freehand?
Most Bowie knives sharpen best at 15–20 degrees per side. Use 20 degrees for a tough, durable edge designed for heavy-duty cutting. Use 15 degrees for a finer, keener edge better suited to slicing and detail work.
How often should I sharpen my Bowie knife freehand?
Sharpen your Bowie knife on a whetstone only when it needs it typically every few months with regular use. Strop the blade after each use to maintain the edge between full sharpening sessions.
Can I freehand sharpen a Bowie knife without experience?
Yes. Freehand sharpening has a learning curve, but it is accessible to beginners with the right setup. Start with a medium-grit whetstone, focus on maintaining a steady angle, and practice on a less valuable knife before working on a prized Bowie.
What is the difference between honing and sharpening a Bowie knife?
Sharpening removes metal to create or restore the edge bevel. Honing (and stropping) realigns the edge without removing significant material. You sharpen periodically; you hone or strop regularly.
Do I need a special whetstone for a Bowie knife?
No. A standard set of water stones or oil stones in 400, 1000, and 3000 grit covers everything you need for freehand sharpening a Bowie knife. Add a leather strop for finishing.
How long does it take to freehand sharpen a Bowie knife?
A touch-up on a knife that is only slightly dull takes 10–15 minutes. Restoring a neglected or damaged edge from coarse grit through to stropping can take 30–45 minutes.
A Sharp Knife Is a Safe Knife Start Sharpening with Confidence
Freehand sharpening is a skill worth developing. Once you understand the mechanics angle, grit progression, burr formation, and stropping you can restore any Bowie knife to a working edge without relying on machines or guides.
Start with a quality stone, work consistently, and resist the urge to rush through the grits. The edge you produce freehand, with your own hands and attention to detail, will outperform anything a pull-through sharpener delivers.
If you are looking for a well-built Bowie knife worth sharpening, browse our full range of Bowie knives each one crafted for real use and built to take an edge.